In this article, we have discussed how you can configure the Facebook and Instagram app to use Instagram in Tatsu Gallery Module. The Process may be lengthy but stay along with the article and follow the steps you will get things as we move further.
When you complete the tutorial you will have a basic understanding of how to get Instagram access tokens and permissions to display Instagram posts in the Tatsu Gallery Module.
You will need:
Go to developers.facebook.com, click My Apps, and create a new app. When asked what your app needs to do, select Build Connected Experiences or Something Else/For Everything Else.
Next, to create an App, you will need to enter App Display Name, App Contact Email and answer Do you have a Business Manager account? as ‘No’ and hit the Create App button.
Once you have created the app and are in the App Dashboard, navigate to Settings > Basic, scroll to the bottom of the page, and click Add Platform.

Choose a Website, add your website’s URL, and save your changes. You can change the platform later if you wish, but for this tutorial, use the Website.

Click Products, locate the Instagram Basic Display product and click Set Up to add it to your app.

Scroll to the bottom of the page and click Create New App.

In the form that appears, complete each section using the guidelines below.
Enter the name of the Facebook app you just created.
Enter your website’s URL. Normally this would be a dedicated URI that can capture redirect query string parameters, but for this tutorial, your website’s URL will be fine.
For example: https://mywebsite.com/auth/
After you enter a URL, save your changes and check the URL again; we may have appended a trailing forward slash depending on your URL structure. Copy the complete URL somewhere since you will need it in later steps to get authorization codes and access tokens.
Enter your website’s URL again. Eventually, you will have to change this to a URL that can handle de-authorization notifications, but for the purposes of this tutorial, you can re-use your website URL.
Enter your website’s URL once again. Just like the Deauthorize Callback URL, you will eventually have to change this to a URL that can handle data deletion requests, but for now, you can re-use your website URL.
Navigate to Roles > Roles and scroll down to the Instagram Testers section. Click Add Instagram Testers and enter your Instagram account’s username and send the invitation.

Next, a window pops up directing you To add an Instagram tester, “enter their username” enter the Instagram account username to send the testing invites.
Open a new web browser and go to www.instagram.com and sign in to your Instagram account that you just invited. Navigate to (Profile Icon) > Edit Profile > Apps and Websites > Tester Invites and accept the invitation.

After completing the above steps now you need to copy the Instagram Token by navigating to the Instagram Basic Display.
Navigate to the Instagram Basic Display > Basic Display > User Token Generator and hit the Generate Token button.
Copy the Generated Token String and Paste it on a notepad or a sticky note on the computer itself temporarily.
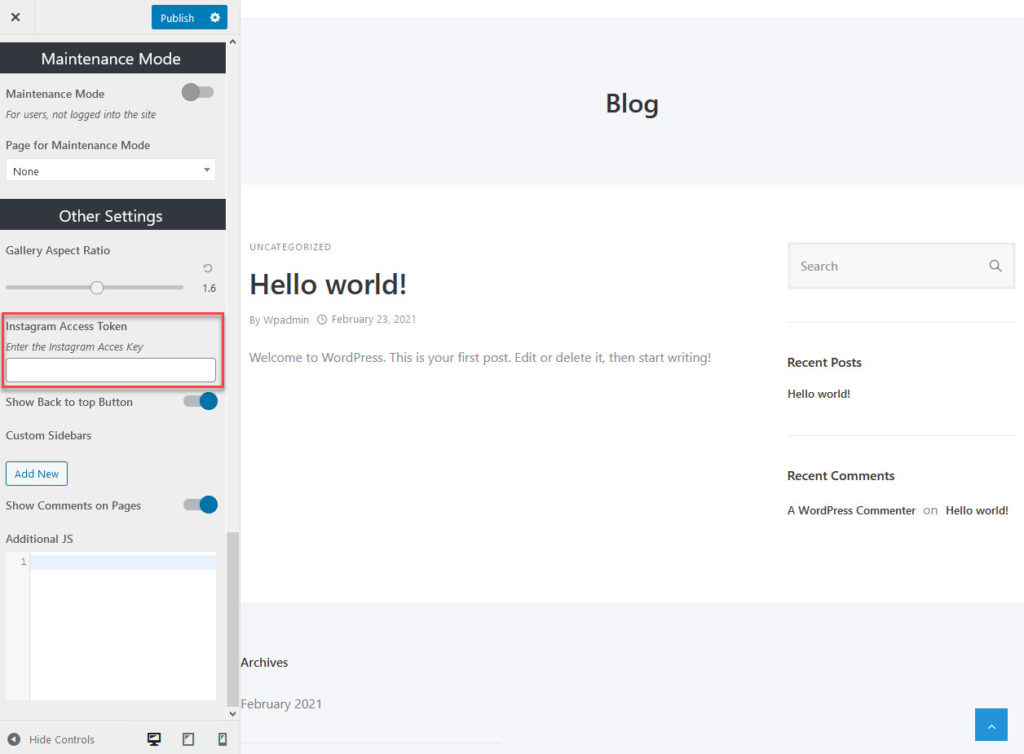
From the Exponent Theme Navigate to Appearance > Customize > Global Site Settings > Other settings > Instagram Access Token here you need to paste the token and Save the Changes.
After this, you can start creating new sections and adding images
Create a new Page/Post and add a Gallery Section. From the Image Source Drop Down select Instagram and hit the save button.

You will see the images from the linked Instagram Account appear in the gallery section and you can customize the appearance as per your needs and make it look much more appealing and enticing using various customization options.